How to set up a GPU instance for machine learning on AWS
We’ve all tried to train a deep learning model on our laptop, haven’t we? It’s fairly fast for small datasets and shallow models! However, their performance usually improves with the size of the training data and the number of trainable parameters (ie models with deep architectures). Training larger models on conventional machines is computationally expensive though and can lead to significant downtimes that slow your research.
A solution to this problem is using a Graphics Processing Unit (GPU). Training deep learning models involves multiple matrix multiplications and GPUs are well-suited for doing these calculations in parallel. The catch is that our laptop’s GPUs are usually fairly weak for this stuff while configuring CUDA (Nvidia’s system that enables computing on its GPUs) can be a painful process.
All these are solved by using an Amazon Machine Image (AMI) from AWS that is preconfigured with everything you will need to train your deep learning models. Let’s see how you can do this!
Notes before we begin
- Creating EC2 instances with a GPU will incur costs as they are not covered by the AWS free tier. In this tutorial, I use a g3s.xlarge instance which at the time of writing, costs $0.75/hour.
- If you want to experiment with training models on a GPU and you enjoy using Jupyter Notebooks, Google Colab comes with a free GPU.
Navigating the EC2 Dashboard
Sign in to the AWS Console and navigate to Services>EC2.

Now, you are in the EC2 Dashboard. It shows an overview of your EC2 setup, such as the instances you currently have, their health status, disk storage and security group. In this page, you can also launch new instances.

You will notice that the instances are assigned to a region which in my case is Europe (London). This affects the hourly cost of your instance. Check out the AWS documentation to learn how to change it.
Click on Launch instance to set up your EC2 instance.
Setting up an EC2 instance
Choose an AMI

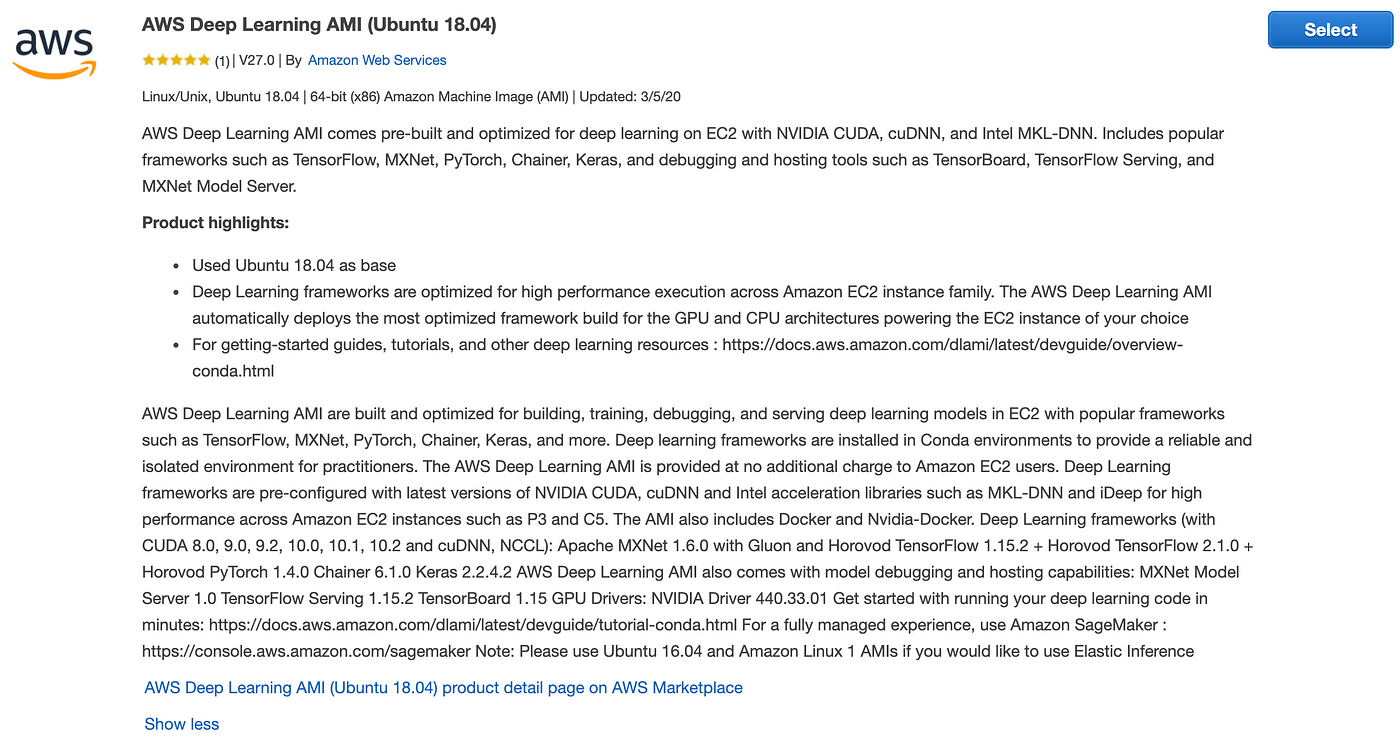
An Amazon Machine Image (AMI) is a template that contains the software bundle (operating system, application server, and applications) of your instance. We would like our instance to come with the popular deep learning frameworks pre-installed and configured to work with CUDA. Bonus points for AMIs that come with an Anaconda distribution and Jupyter Notebooks!
Navigate to the AWS Marketplace and search for machine learning. One of the top hits is the AWS Deep Learning AMI (Ubuntu 18.04). It has everything we need so let’s use it.
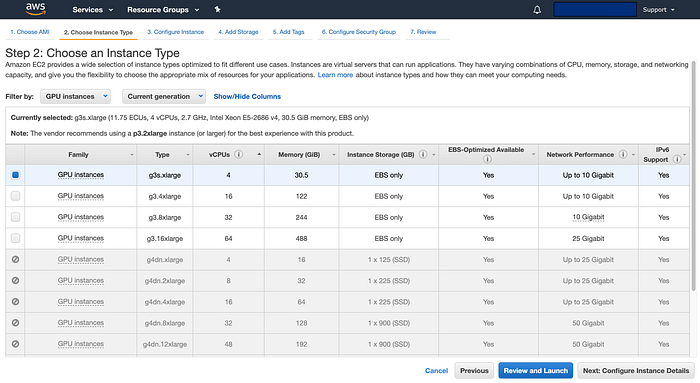
Choose an Instance type
AWS offers a variety of instances that are optimised for different things. You can hover over the values of the Family column to learn what each group is designed to do.
We want to filter by GPU instances and choose the g3s.xlarge as it is one of the cheapest options. AWS suggests us using a p3.2xlarge instance (or larger) so feel free to go with that if you want to. Beware of the cost though; it’s $3.5/hour.
Select the g3s.xlarge and click on Next: Configure Instance Details.
Important note: AWS has introduced usage limits based on the number of vCPUs that are available to your account for each instance families. Roughly, the more expensive an instance, the more vCPUs you need for it. If you don’t have enough vCPUs available, the launch of your instance will fail. Don’t worry though; you can submit a limit increase request form to the AWS Support and they will assign vCPUs in approximately a day.
Configure the Instance
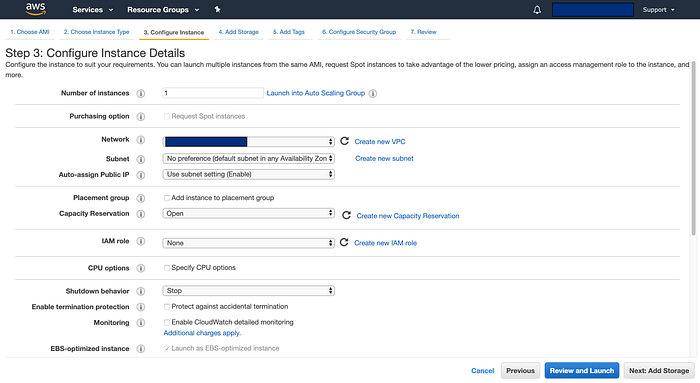
You can configure your instance by choosing a VPC among other things. You can also launch multiple instances with the same configuration if you want to. For this tutorial, we will continue with the default values.
Add storage
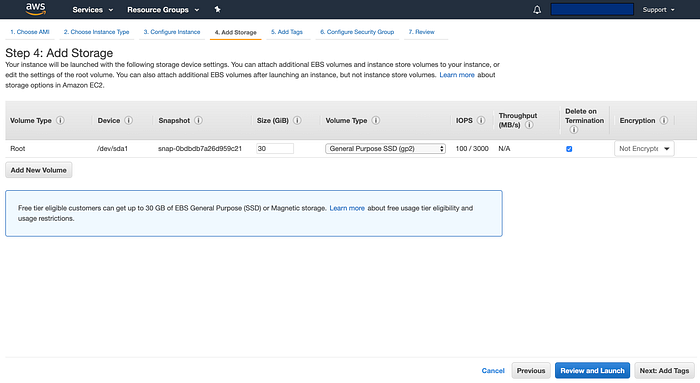
Select how much storage you want your instance to have. Note that using up to 30GB of SSD or Magnetic storage is free.
You can now click on Next: Add Tags (no need to add any tags for now) and then Next: Configure Security Group.
Configure the Security Group
Security groups create a virtual firewall that controls the inbound and outbound traffic of your instance. In simple terms, they determine who can access it. Allowing unrestricted access to your instance might be what you need in some cases (for example, when building a public web application), however, you should create a security group in most scenarios.
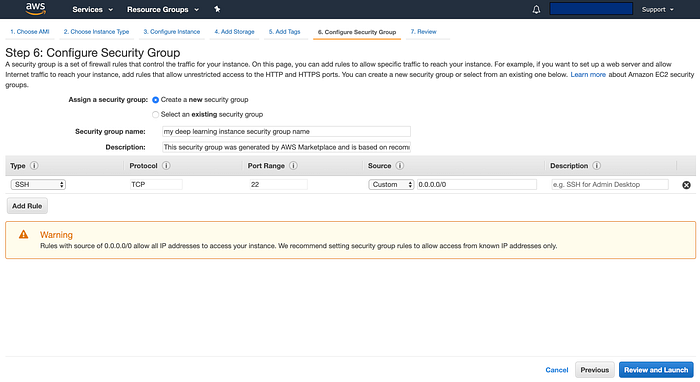
For the purpose of this tutorial, you can work with an open port or switch the Source from Custom to My IP. To use Jupyter Notebooks, click on Add Rule, select the Custom TCP Rule, change the Port Range to 8888 and the Source to Anywhere.
Once you’re set, click on the Review and Launch button to review your instance’s details and then Launch your instance.
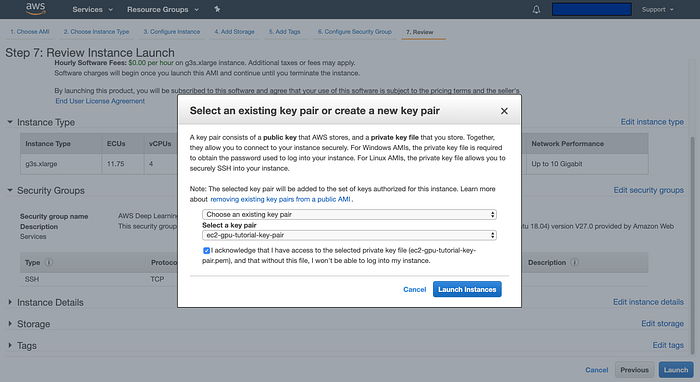
This will pop-up a window asking you to select an existing key pair or create a new one. For this tutorial, I created and downloaded a new key pair called ec2-gpu-tutorial-key-pair.pem.
Clicking on Launch instances will redirect you to a page informing you of your instance’s launch status. Scroll to the bottom of the page and click on View instances to return to the EC2 Dashboard.
Connect to your instance
Select your newly created instance and click on the Connect button which is located above the list of your instances. It will pop-up a window with instructions on how to connect to it.
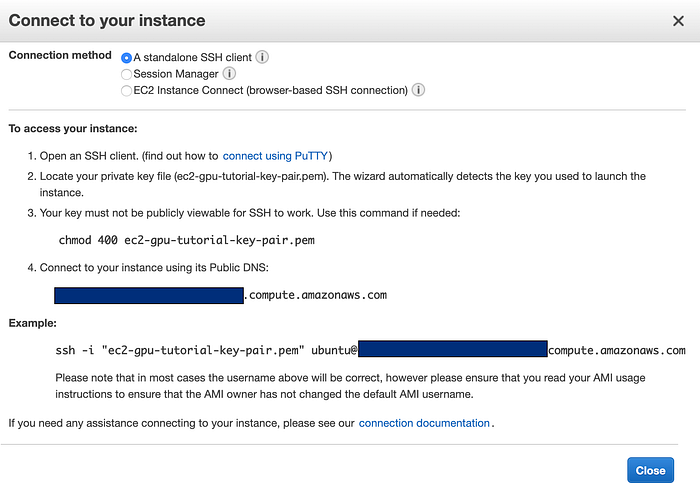
Open the command line and execute the instructions. You may need to confirm the authenticity of the key fingerprint. Simply type yes and hit enter.

We are in!
Anaconda environments and Jupyter Notebooks
Conveniently, the instance informs us of the Anaconda environments that already exist in our virtual machine. Let’s activate the environment that has torch and Python 3:
source activate pytorch_p36Then, we can launch a Jupyter Notebook:
jupyter notebook --no-browser --port=8888Among the generated messages, spot the token which should be a long sequence of characters. Keep a copy of it as we will use it shortly. Open a separate Terminal window and type:
ssh -i ec2-gpu-tutorial-key-pair.pem -L 5511:127.0.0.1:8888 ubuntu@###–##–###–###–###.##-####-#.compute.amazonaws.comNote that 5511 is the port on your machine that matches the one on AWS where the Jupyter kernel is running. You can use any number you want, as long as it is not taken by another service! Open your browser and navigate to http://127.0.0.1:5511.

We need to give the authentication token we generated when we launched the Jupyter kernel. You can also choose a New Password so that you don’t have to search for the token every time.
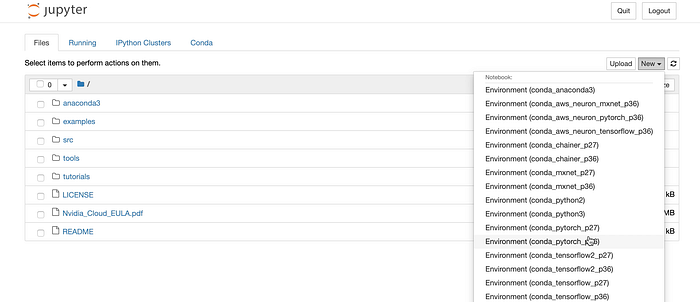
We did it! Now we can choose which Anaconda environment we want to work in and launch new Jupyter Notebooks!
Conclusion
Fitting models or using pre-trained ones on a GPU instance can significantly speed up your research. For example, I am regularly using them to speed up the NLP and information retrieval tasks I work on, such as inferring document embeddings using Transformers and developing vector-based search engines.
If you want to learn more about my work as a Mozilla Fellow, have a look at these posts: